Using jQWidgets Angular Components with Angular Reactive Forms
What are the Angular Reactive Forms ?
Angular Reactive Forms facilitate a reactive style of programming that favors explicit management of the data flowing
between a non-UI data model and a UI-oriented form model that retains the states and values of the controls on screen.
Reactive forms offer the ease of using reactive patterns, testing, and validation.
You create and manipulate form control objects directly in the component class. As the component class has immediate
access to both the data model and the form control structure, you can push data model values into the form controls and
pull user-changed values back out. The component can observe changes in form control state and react to those changes.
One advantage of working with form control objects directly is that value and validity updates are always synchronous and under your control.
Integrating Reactive Forms
Lets assume our project is using Angular CLI and it is set up.
The first thing we have to do is to import the ReactiveFormsModule into our app.module.ts file.
app.module.ts
Then we must import the Angular Reactive Forms specific functions in our component:
Our form will be bound to an instance of FormGroup. We will use the FormBuilder to handle form control creation, and Validators will help setup validation on each form control. ValidatorFn and AbstractControl are needed for the custom validation functions.
Now let's check our class step by step:
First of all in order to use the FormBuilder we need to use dependency injection:
Then we can create our form:
We are defining myForm as a FormGroup and then we are creating our Form.
It will have email and username input fields and terms checkbox.
As you can see the first element of all of our form controls is an empty string. This is the initial value of the form control and we want it to be blank.
Then we have build in validators like Validators.required or custom ones like
checkForCapitalLetter, checkForSpecialOrDigit or checkForLowerCaseLetter methods.
All this methods receive a Regex Expresion, tests the control value with it and return null if validation succeeds or an object if the validation fails.
In the constructor we find also the code with which we are checking our Form Validity. We subscribe to the valueChanges observable and call the checkFormValidity method every time the user changes something in our form controls.
This method checks all of our form controls for errors and if found one places the error message for the given error in the object errMsgs. In the template of our component we cycle through this object and print if any errors.(template code below)
app.component.html
We bind myForm as a formGroup, which lets our component code know that this is the form that's associated with myForm.
Each of our form controls has a formControlName attribute with the name, which must match the associated name in our component code.
Under our form controls we find a div element which shows itself with li elements corresponding to the number of errors in that form control.
And at the bottom we find two buttons. The first one is enabled only if all of our form validation is okey. The second one clears our form.
Note: We use Bootstrap for styling and responsiveness.
Here is the whole app.component.ts:
app.component.ts
Conclusion
Using Angular Reactive Forms gives you an easy control over the form. They allow for much more flexibility and they also help keep your logic in the component class and your templates simple.
Hope this tutorial helps you start with the Angular Reactive Forms. For more in depth involvement please visit the official Angular Reactive Forms tutorial.
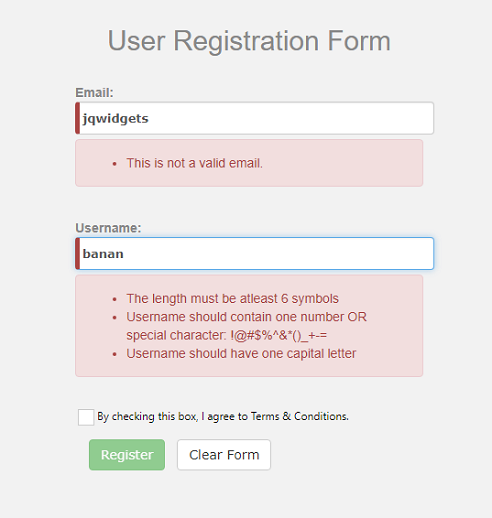
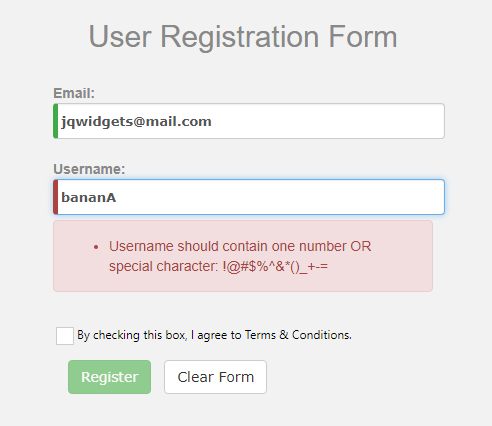
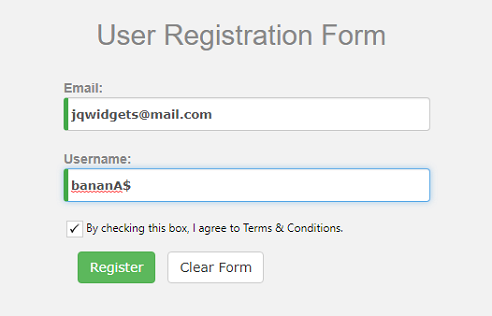
Here are some screenshots of the app: