Angular Server-Side Filtering
This tutorial shows how to create a Server-Side Filtering for jqxGrid with Angular. It will request data from the server for a new filter or when clearing the filtering. The Server-Side script will provide the related data as a JSON object.
Overview
We will create our simple server with the powerful Node.js platform, we will handle our queries and get the data from the familiar Northwind database. For this purpose, we need to include a few plugins to achieve that we want - like express and mysql for our server script. About the Client-Side, we will use the jqxGrid on the Angular 2+ framework. We assume that this tutorial is known and we will continue from this position with the next steps.
Getting Started
The next step is to install the desired plugins. For this purpose, we open the terminal and navigate to the root of the current project.
/root
    /my-app
    /node_modules
    server.js
I. Let's install the express package. In the terminal use the command below:
npm install expressII. Install the mysql package. Enter the following command:
npm install mysqlReview of the current state
The package.json file should have dependencies for the newly added plugins.
How to create it you can look at this.
Start our XAMPP server
We need to connect with our database.
In our tutorial, we will use the Northwind database.
For this purpose we will use the XAMPP with the same success we could use WAMP or another alternative.
Here we will skip the steps of the installation of these platforms because we assume that this is known already.
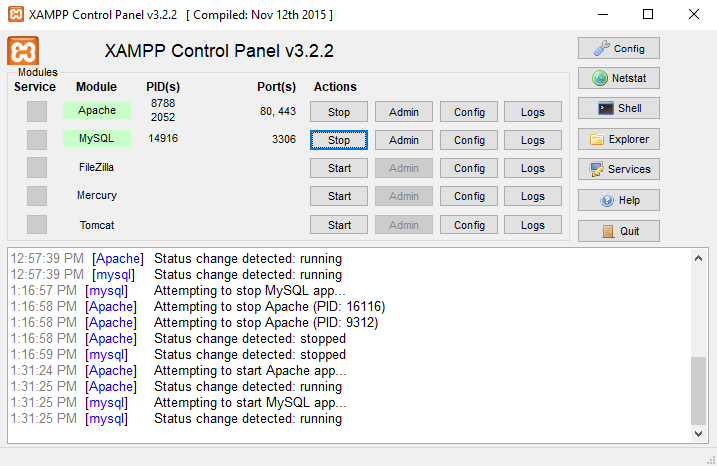
We need to start the first two options - Apache and MySQL as in the image above. This is enough to proceed with the next steps. To create one fully working example.
Server-Side - Handling requests with Node.js
The prepared example with jqxGrid will make requests to the server with a bunch of extra arguments.
The jqxGrid automatically passes the Sort, Page and Filter parameters (Read more about that here).
Important for us now are
filterscount,
filtervalue,
filtercondition,
filterdatafield and
filteroperator because we make a Server-Side Filtering scenario.
We will create a server.js file that will do the mentioned above.
The file will be in one level up of the Angular my-app folder.
Client-Side - Visualizing the data in jqxGrid
We have a lot of examples in our Angular demos section, especially for the jqxGrid.
Which can be used to create the desired structure and to use the most suitable approach for us.
Also, we suppose that we already are familiar with the Angular CLI & jqwidgets-ng tutorial.
Based on these points we will start directly with the editing.
Navigate to the root/my-app/src/app folder.
Let's make the following changes:
app.module.ts:
app.component.ts:
app.component.html:
Summary
We use a lot of different technologies to achieve Server-Side Filtering.
- XAMPP - to connect to the MySQL with the Northwind database
-
Node.js - to create a simplified server application
- express plugin - handling different routes
- mysql plugin - for SQL queries to the database
- Angular 2+ - our Client-Side technology
- jqxGrid - visualize the data from the database
Required Final Steps
We should run everything and we should have one fully working jqxGrid Angular example with Server-Side Filtering. The XAMPP should be launched as we described before.
The next step is to run our Node.js server. Open the terminal with the root directory (/root/server.js) of our application and type:
node server.js
This will execute our server.js file and our server will run.
Now we should open another terminal with the root (/root/my-app/) of our Angular project. Type the familiar command:
ng serveThis should run our Angular project at the following port:
http://localhost:4200/Final Result